







Free shipping, duties included on US orders

Description
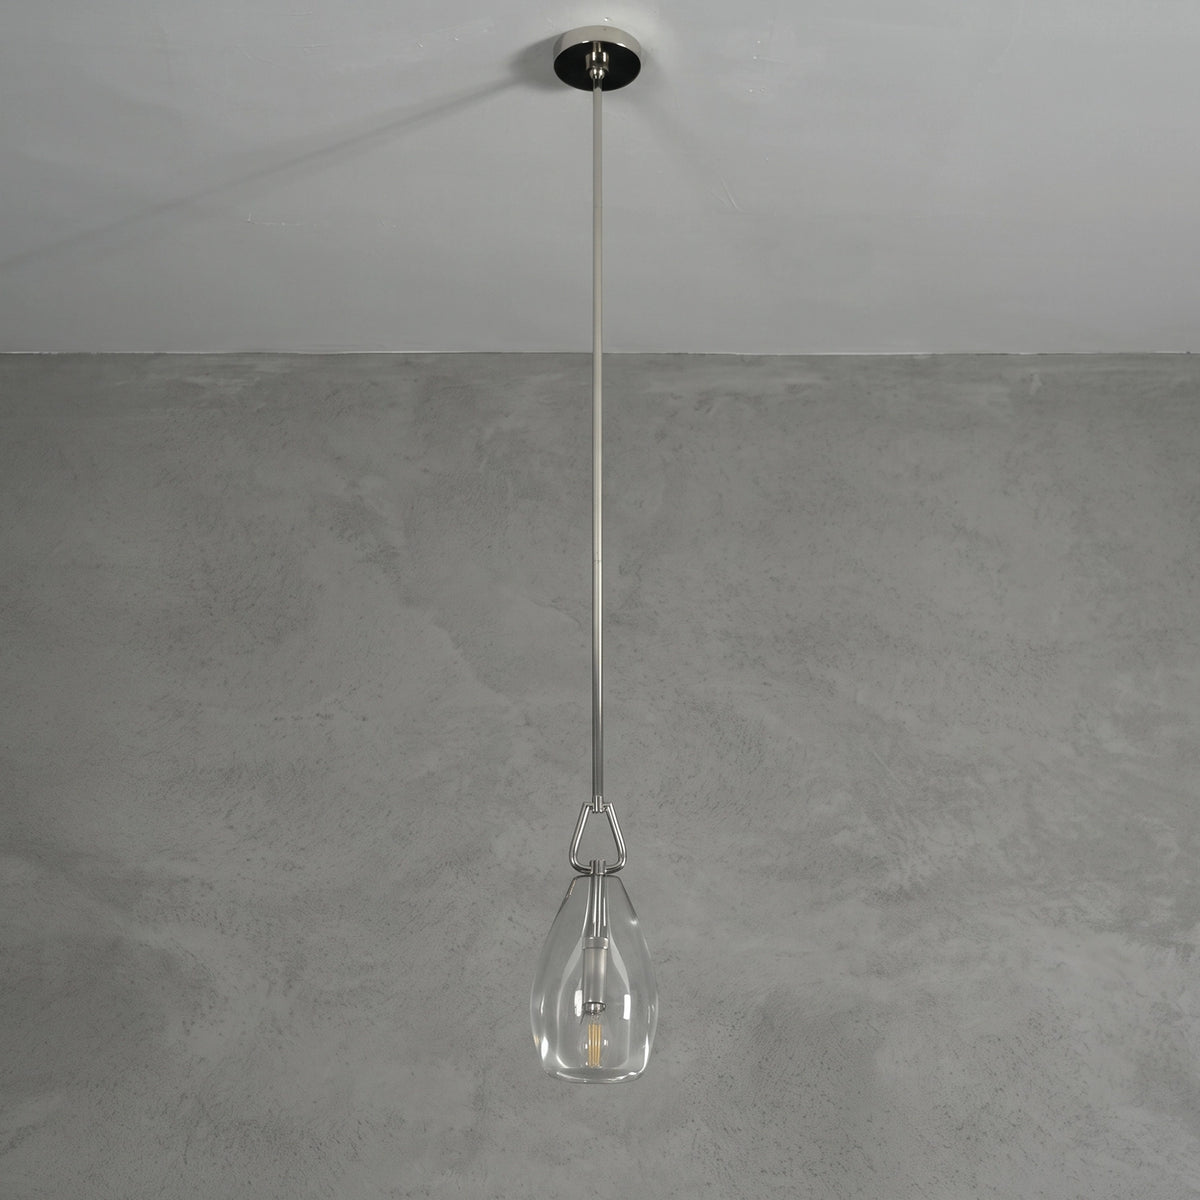
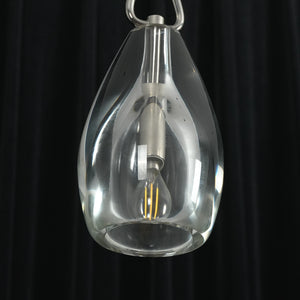
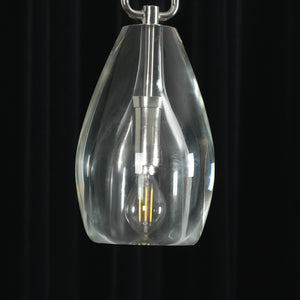
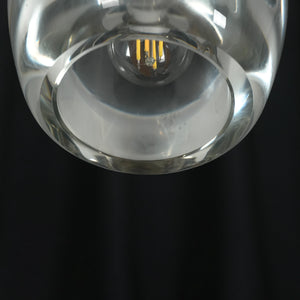
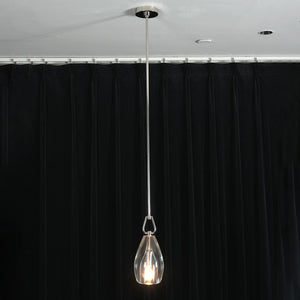
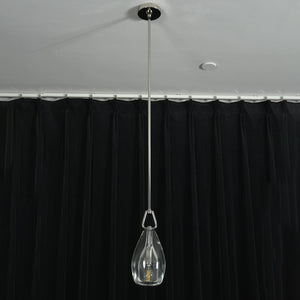
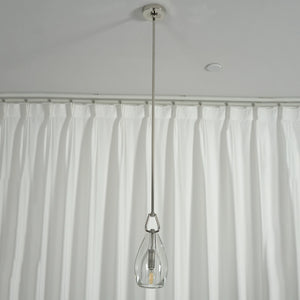
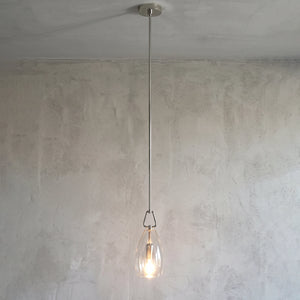
The Lumen Crystal Teardrop Pendant is built around a material that behaves differently from the glass most clear pendants are made of. Crystal carries a higher refractive index, which means light entering its wall bends further before it leaves — and this shade has the wall thickness to make that visible, with a solid rim of crystal at the base before the opening begins. Ordinary glass in this shape would simply look transparent. Here every curve becomes an optical surface: the edges hold a bright line, the base rim gathers light into a ring, and a single filament repeats across the whole form.
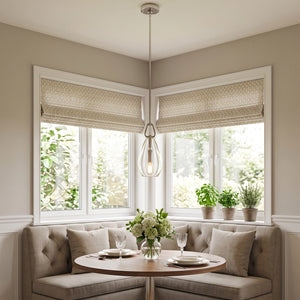
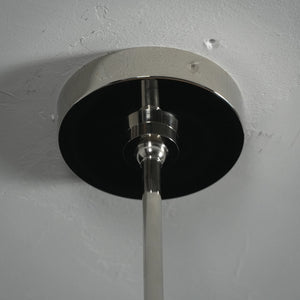
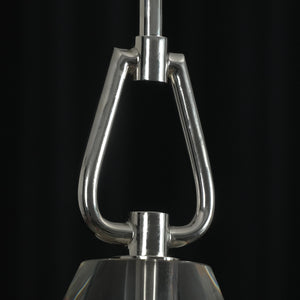
Above it, a polished nickel triangular ring hangs the teardrop from a rigid rod rather than a cord, so it stays exactly where you set it and never twists out of line. Rods come in 6″, 12″ and 18″ sections that combine to set your drop — the same fixture works over a kitchen island at eight feet and down a stairwell at sixteen. The metal is polished nickel over solid brass: the plating gives the mirror finish, the brass underneath gives it weight and keeps the surface stable at the edges. A crystal pendant light for an island, a dining table, a stairwell, or anywhere a small point of light should be worth looking at.
Why This One
Crystal Thick Enough to Bend Light
Hand-blown crystal with nickel-plated brass hardware — E12 base, max 40W, bulb sold separately
Specifications
Features & Details
| Features | |
| Material | Hand-blown crystal · nickel-plated brass hardware |
| Metal Finish | Polished nickel over solid brass — rod, loop, collar and canopy |
| Crystal | Clear, hand-blown with substantial wall thickness — solid rim at the base, open below |
| Shade Size | ⌀ 5.9″ × H 13.4″ |
| Rods Included | 6″ · 12″ · 18″ — combine to set your drop, longer rods on request |
| Light Source | One E12 candelabra base — bulb sold separately |
| Power | Max 40W — a 2700K clear LED filament bulb is the intended look |
| Mounting | Ceiling mount — hardwired to a junction box |
| IP Rating | IP20 · indoor dry locations only · not waterproof |
| Dimming | Depends on the bulb — fit a dimmable E12 and a compatible wall dimmer |
| Style | Transitional · Mid-century modern · Modern minimalist · Contemporary · Modern luxe |
| Application | Kitchen island · Dining table · Stairwell · Bedside · Entryway · Hallway (indoor only) |
| Specification | |
| Voltage | 110V–240V compatible |
| Installation | Hardwired ceiling mount — professional installation by a licensed electrician recommended |
| Control | Works with a standard wall switch — switch not included |
| Drop Adjustment | Set on site by combining the supplied rods — contact us before ordering for a longer drop |
| Electrical Certification | UL / CE / SAA (wiring & sockets) |
| Warranty | 720-day |
Caring for crystal and plated brass: clear crystal shows dust and fingerprints more readily than frosted glass, and thick crystal shows them twice — once on the surface and again refracted through the wall. A dry microfibre cloth handles both the crystal and the metal; on the crystal, a barely damp cloth followed immediately by a dry one leaves no streaks. No abrasive pads, and no metal polish on the plated finish. Switch the power off at the wall and let the bulb cool before cleaning — and support the shade from below while you wipe it, since the weight sits at the base.
Size & Drop
The Shade Is One Size. The Drop Is Yours.
Three rod lengths ship with every pendant. Combine them on site to set exactly how low it hangs — which is what makes the same fixture work over an island and down a stairwell.
How Low Should It Hang?
Measured from the bottom of the crystal, not the canopy
Drawn to scale. Furniture shown for reference only and is not included.

Get the drop right the first time: rods are fitted at installation, so decide the height before the electrician arrives rather than after. If your ceiling is above 10 ft or you are hanging into a stairwell, contact us before ordering — we can supply a longer rod with the fixture rather than leaving you to source one afterwards.
How It's Made
Three Places to Look Closely
On a fixture this simple — one shade, one rod, one ring — the workmanship shows in a small number of places. These are the three worth examining before you buy.


Living with crystal and plated brass: both show fingerprints, and thick crystal shows them twice — once on the surface and again refracted through the wall. A dry microfibre cloth handles both; on the crystal, a barely damp cloth followed immediately by a dry one leaves no streaks. No abrasive pads, and no metal polish on the plated finish. Support the shade from below while you wipe it, since the weight sits at the base.
Why Crystal
Light Goes Through Glass. It Travels Inside Crystal.
This is the whole reason for the material, and it is easier to see in a diagram than to describe. Thin glass lets light pass; thick crystal bends it, holds it, and gives it back at the edges.
Diagram, not a photograph — drawn to show how light behaves in each wall.


One thing to expect: clear crystal shows dust and fingerprints more readily than any frosted shade, and thick crystal shows them twice — once on the surface and again refracted through the wall. It wipes clean in seconds with a dry microfibre cloth, but it is not a fixture you can hang and forget for a year.
Hang a Row
One Is a Detail. Three Is a Ceiling.
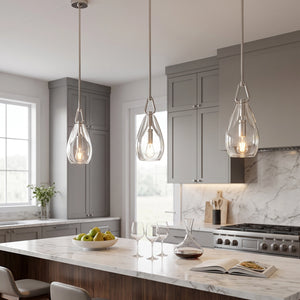
At 5.9″ across, this is a pendant built to repeat. A single one lights a spot; a row of three carries the length of a counter and turns the ceiling above it into part of the room.

Three pendants at even centres, each on its own junction box, all on one switch.
Setting Out a Row of Three
Measured centre to centre, with the outer two set in from the ends
Drawn to scale. Counter shown for reference only and is not included.
Before you order a set: each shade is hand-blown, so wall thickness varies slightly from piece to piece and the highlights fall in marginally different places. Across a row that variation reads as depth rather than as a fault — but order them together so they come from the same run, and tell us it is a set of three so we pick them as a group.
Where It Goes
Three Rooms, Three Drops
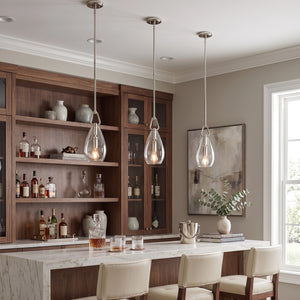
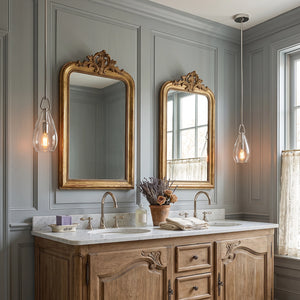
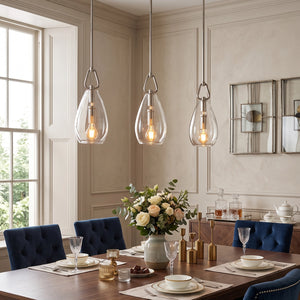
The same fixture reads differently depending on how low it hangs and what sits beneath it. These are the three arrangements the rods are built for.


Shown with 2700K clear LED filament bulbs — E12 base, bulbs sold separately
Crystal Pendant FAQ
Which bulb does it take, and does the type matter?
How do I work out which rods I need?
How low should it hang?
Is it glare-y? The glass is completely clear.
How many should I hang over an island?
Will every shade look the same?
Is clear crystal hard to keep clean?
Shipping Time & Costs
Shipping Made Simple
We’ve got you covered with easy and reliable shipping options
Total Delivery Time = Processing Time + Shipping Time
Processing or Handling Time :
The processing time begins from the date you place your order. It usually takes 3 to 5 Business Days (Monday to Friday) to process your order. Once we’ve processed it, we can then ship it.
Customized products: Customized lighting fixtures require additional production time. Please note that the processing of such orders may require an extra 5-12 business days, and the total estimated delivery time will be extended accordingly.
Shipping Charge and Transit Time:
Free Standard Shipping (25-40 business days): Free for all orders.
Expedited Shipping (9-14 business days): Faster delivery is available—please read our Shipping Policy for specific fees.
Refund and Return Policy
Thank you for shopping with us. We understand that you want every item you purchase to perfectly suit your home. To ensure a pleasant and worry-free shopping experience, please read the following policy carefully before making your purchase.
1. Return Period and Product Condition
Our standard return policy is valid for 30 days from the date you receive your order. If more than 30 days have passed since delivery, unfortunately, we cannot offer a refund or exchange.
Important: Items that have been installed, have broken wiring, or loose crystals are not eligible for return.
All returned items must meet the following requirements:
-
Original Condition: Must be unused, unworn, and include all original tags, labels, and packaging.
-
Complete Accessories: All accessories, manuals, and included items must be intact. Items requiring assembly must be returned unassembled.
-
Proof of Purchase: You must provide a valid order number or proof of purchase.
Exceptions – Cannot Be Returned:
-
Customized, modified, or special-order items (including products marked “Custom Invoice,” “Made to Order,” or “Final Sale”).
-
Items not in their original condition or packaging (used or altered).
-
Returns caused by misunderstanding the product listing.
2. Eligible for Returns/Exchanges
Customers are entitled to a full refund or replacement in the following cases:
-
The product is damaged due to quality issues or transportation.
-
Any item returned to sender undelivered.
-
Any item not delivered within 90 days.
For all eligible returns, we bear all costs and guarantee 100% return/refund or free replacement.
3. Not Eligible for Return/Exchange
Certain items are not eligible for returns or exchanges:
-
Products that do not qualify for the 30-day return policy.
-
Bespoke, custom, or special-ordered products.
-
Products not in original condition or packaging.
4. Shipping Costs for Customer-Initiated Returns
If a return is initiated due to the customer’s personal reasons, the customer is responsible for the return shipping costs. The exact fee depends on the chosen courier service. Customer-related reasons include:
-
The customer feels the product does not meet their expectations;
-
The customer finds the size too small or too large;
-
The customer believes the color does not match expectations;
-
The customer wants to return the product for personal reasons (e.g., changed mind or no longer needs the item);
-
The customer ordered the wrong item or quantity;
-
The customer did not carefully read the product description and is surprised by the product’s features or specifications.
5. Return & Exchange Process
Before returning any items (within 30 days), please contact our customer service team. Returns without prior authorization will not be accepted.
Step 1: Submit Your Request
Email support@hoailamp.com with:
-
Order number
-
Item(s) to return or exchange
-
Detailed reason for return/exchange
-
Photos if there is a quality issue
Step 2: Wait for Authorization
Before sending your package, you must contact Hoailamp via email to obtain an RMA (Return Merchandise Authorization) number. Items sent without authorization may not be processed.
Email: support@hoailamp.com
Once approved, please send your package to the following return address and follow the packaging instructions carefully:
Return Address:
Recipient: Zhang Lei
Address: Building 4, No. 80 Longxi Road, Jianghai District, Jiangmen City, Guangdong Province, China
Postal Code: 529080
Step 3: Package & Ship
-
Take photos of the product and packaging before shipping to show it is in original condition.
-
Include order confirmation, all original accessories, and packaging.
-
Email us the tracking number after shipping.
Step 4: Refund or Exchange Processing
-
Refunds:
We will refund to your payment account after returned once the refund approved. Keep in mind that it may also take some time for your bank or credit card company to process and issue your refund.
If you paid with a credit or debit card, we will refund your money to the same card once we receive your return. Refunds will take 5-7 business days.
If you paid with PayPal, we will refund your money to your PayPal account once we receive your return. Refunds will take approximately 1-3 business days.
To check the status of your refund, please visit the your Account- Orders history page.
-
Exchanges: We will process your return within 3–5 business days after receiving the returned item, and ship the replacement once the inspection is completed.
6. European Union 14-Day Cooling-Off Period
EU customers have the right to cancel or return an order within 14 days without justification. The item must be unused, with tags, and in original packaging, with proof of purchase.
7. Special Conditions
-
Order Cancellation: Within 24 hours of confirmation, free of charge.
-
Custom Items: Cannot be canceled.
-
Non-Custom Items:
-
Cancel within 24 hours of placing the order, no cost.
-
Cancel after 24 hours but before shipment, $50 handling fee.
-
Once shipped, orders cannot be canceled.
-
8. Contact Us
If you have any questions about returns, exchanges, or cancellations, contact our customer service team:
-
Email: support@hoailamp.com
Hoailamp reserves the right to update or modify this policy at any time without prior notice.
Secure Payment Policy
We are committed to providing a safe, secure, and seamless shopping experience. Protecting your personal information and payment security is our highest priority.
1. Website Security
We take online security seriously and implement industry-standard measures to protect your data throughout your browsing and shopping experience.
Secure Encryption:
Our website uses advanced SSL/TLS encryption technology. All data transmitted between your browser and our servers—including personal information and payment details—is fully encrypted to prevent unauthorized access or interception.
Privacy Protection:
We comply with strict privacy standards and only collect the information necessary to complete your order. All customer data is handled with care and protected through secure systems.
2. Payment Security
We use Shopify Payments to process all transactions securely and reliably. Every payment is protected by industry-leading security standards to ensure a safe checkout experience.
Accepted Payment Methods:
Visa, Mastercard, American Express, Diners Club, Discover, Shop Pay, and JCB.

Shopify Payments Security:
All payments are processed through Shopify Payments, a PCI DSS Level 1 compliant platform. It uses advanced encryption and fraud detection technologies to safeguard your payment information. Built on Shopify’s trusted infrastructure, it ensures every transaction is fast, secure, and reliable.
Important Note:
We do not store or have access to your credit or debit card information. All payment details are securely processed and encrypted by Shopify Payments throughout the entire transaction process.
3. Our Commitment
We are dedicated to providing a secure and worry-free shopping experience. If you have any questions regarding payment security or data protection, please contact our customer support team:
We are always here to help.





Lumen Crystal Teardrop Pendant
Why are good lighting fixtures worth owning?
Good light is worth the wait. Worth the investment. Because this isn't just a lamp — it's a well-made piece that brings warmth, character, and timeless beauty into your home.

Polished Chrome Metal Hardware

Clear Teardrop Glass Shade

Polished Chrome Canopy & Downrod Assembly
You're not just buying a lamp — you're bringing home a piece of art that will light your home for years to come.


Shade Material Craftsmanship: Hand-Cut Solid Crystal vs. Standard Green-Tint Glass

Our Premium Materials
- High-purity raw crystal — pristine, water-like transparency free of impurities.
- High refraction index — scatters light effortlessly into a soft, dazzling 360-degree ambient glow.
- Solid, heavy-cast structure — reassuring weight and substantial thickness that feel premium to the touch.
- Flawless optical purity — completely free of green edges, ensuring a true, warm color rendering.

Standard Materials
- Low-cost soda-lime glass — unrefined raw materials left with a noticeable greenish tint along edges.
- Low refraction & thin walls — flat, harsh light output with limited brilliance and depth.
- Lightweight, fragile build — hollow and delicate feel that lacks durability and luxury.
- Imperfect clarity — visible color distortion that dulls the warmth of your interior lighting.
FAQS
Can l customize the size, color, or material of a fixture?
Looking to make your lighting truly one-of-a-kind?
You can customize the size, color, and material of many of our fixtures! Explore all the possibilities and start designing your perfect piece on our Customization Page.
Have questions or specific requests? Our team is happy to help: Email: support@hoailamp.com
What is the voltage? Is it suitable for use in the United States?
Wondering if this light works with your local voltage? The U.S. standard is 110–120V, and Europe uses 120–240V. We can also customize the voltage to fit your needs. For more details on global voltage standards, check out our Global Voltage Reference Guide.
Are your products certified?
Yes, all of our lighting fixtures are certified to meet the safety and compliance standards of the regions they are shipped to, including SAA/CE Certifications and UL certifications. For more details on our certifications, visit our Certification Page.
Are there any customs duties?
Please note that all prices shown on our website include duties and import charges for US orders; orders to other countries may be subject to local duties and taxes. In most cases, our parcels pass through customs without VAT being charged. However, for larger orders or certain circumstances, we may need to provide additional information to customs and cooperate with the buyer to supply the required paperwork.
Each destination country has its own import tax threshold, which determines the value of goods that can be imported before import duties are charged. For US orders, import duties are included; for other countries, duties, taxes and other charges are not included in the item price or shipping cost. Outside the US, these charges are the buyer’s responsibility, and we are not liable for any delays caused by customs authorities in your country.
For more details regarding applicable fees, we recommend contacting your local customs office.
Are your lights dimmable?
Many of our fixtures are compatible with dimmer switches. Please check the product description or contact us to confirm dimming compatibility before purchase.
Recently viewed products
FREE SHIPPING
Free Shipping for all orders
SUPPORT 24/7
Contact us 24 hours a day, 7 days a week
30 DAYS RETURN
Simply return it within 30 days for an exchange.
100% PAYMENT SECURE
We ensure secure payment with PEV